6 Increase Cloud Storage
In this tutorial, you’ll learn how to increase your cloud storage and mount the volume to a Python environment.
6.1 Increase Cloud Storage
6.1.1 Select Volumes
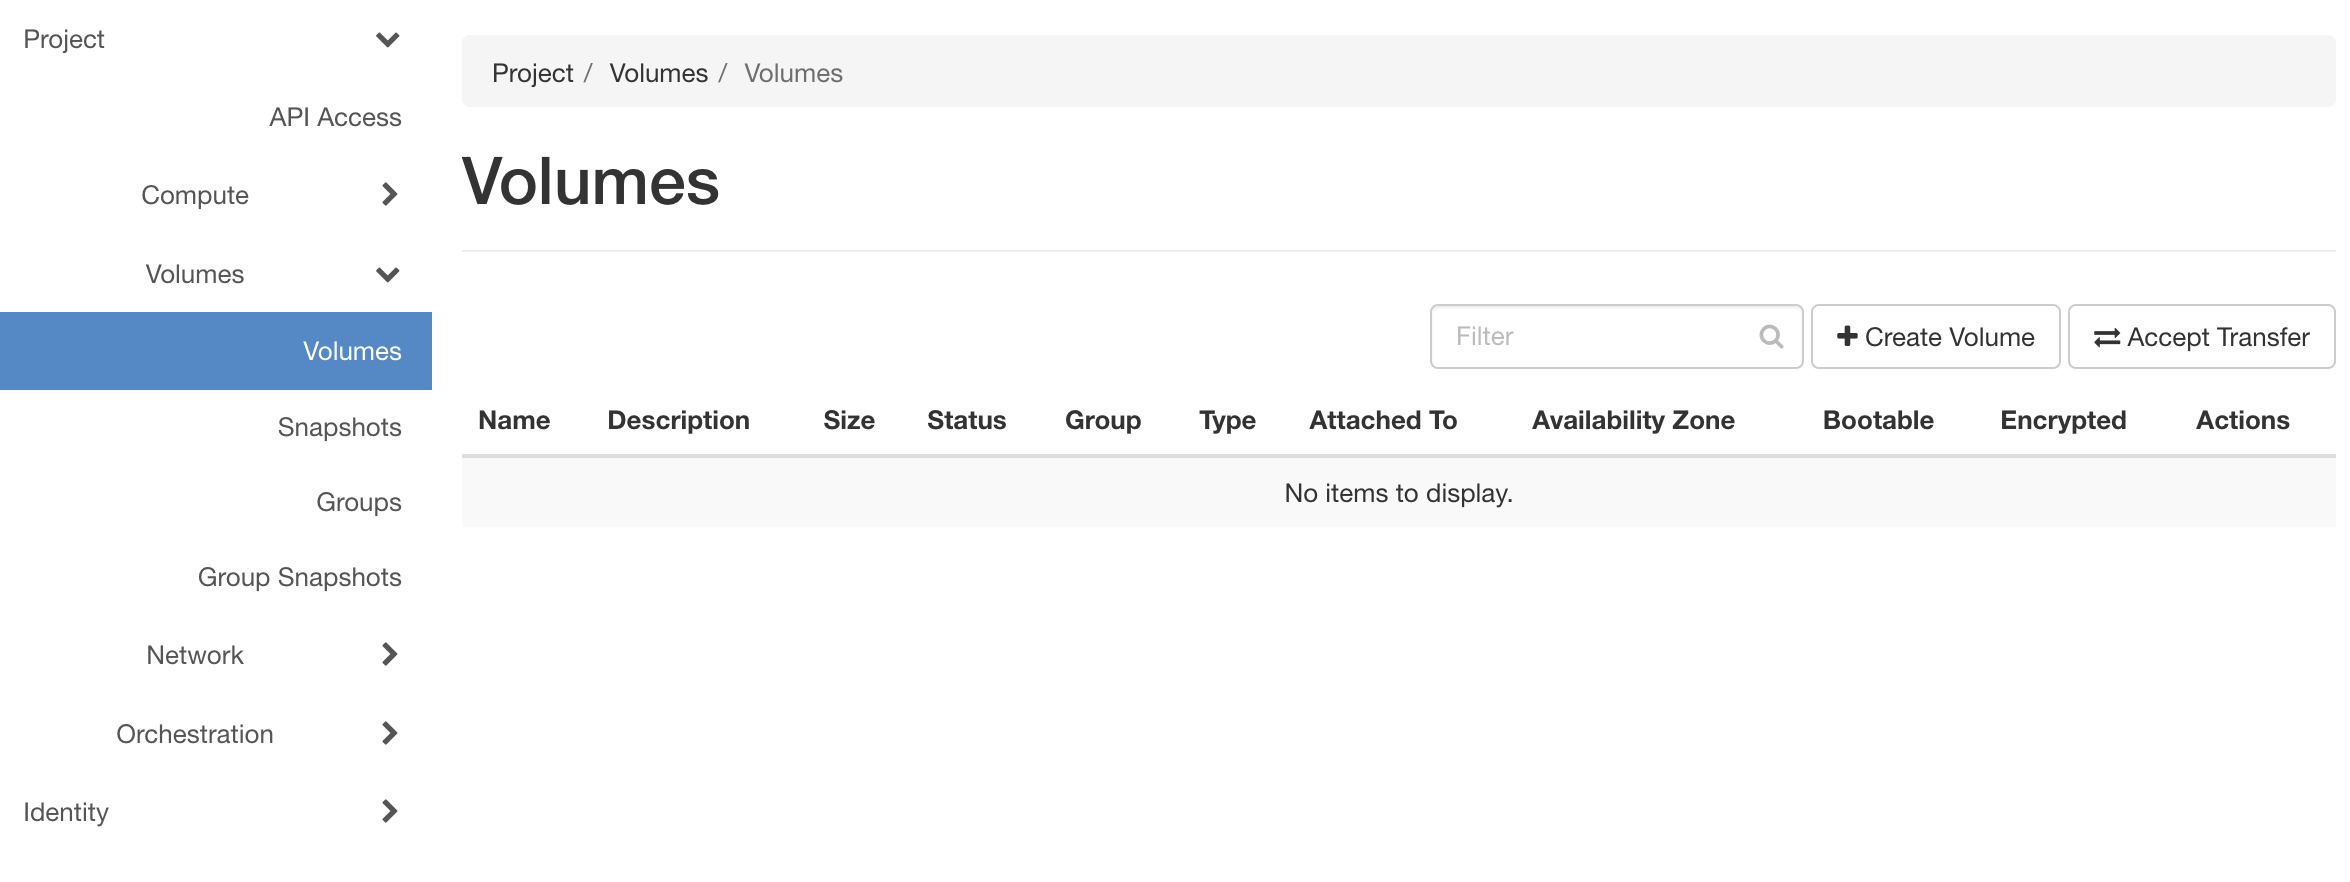
Log in to bwCloud Dashboard
Click on “Volumes” below the “Project” tab
6.1.2 Choose “Create Volume”

- An overview of the volumes you have created so far is displayed. To create a new volume, click on Create Volume
6.1.3 Create Volume in dialogue
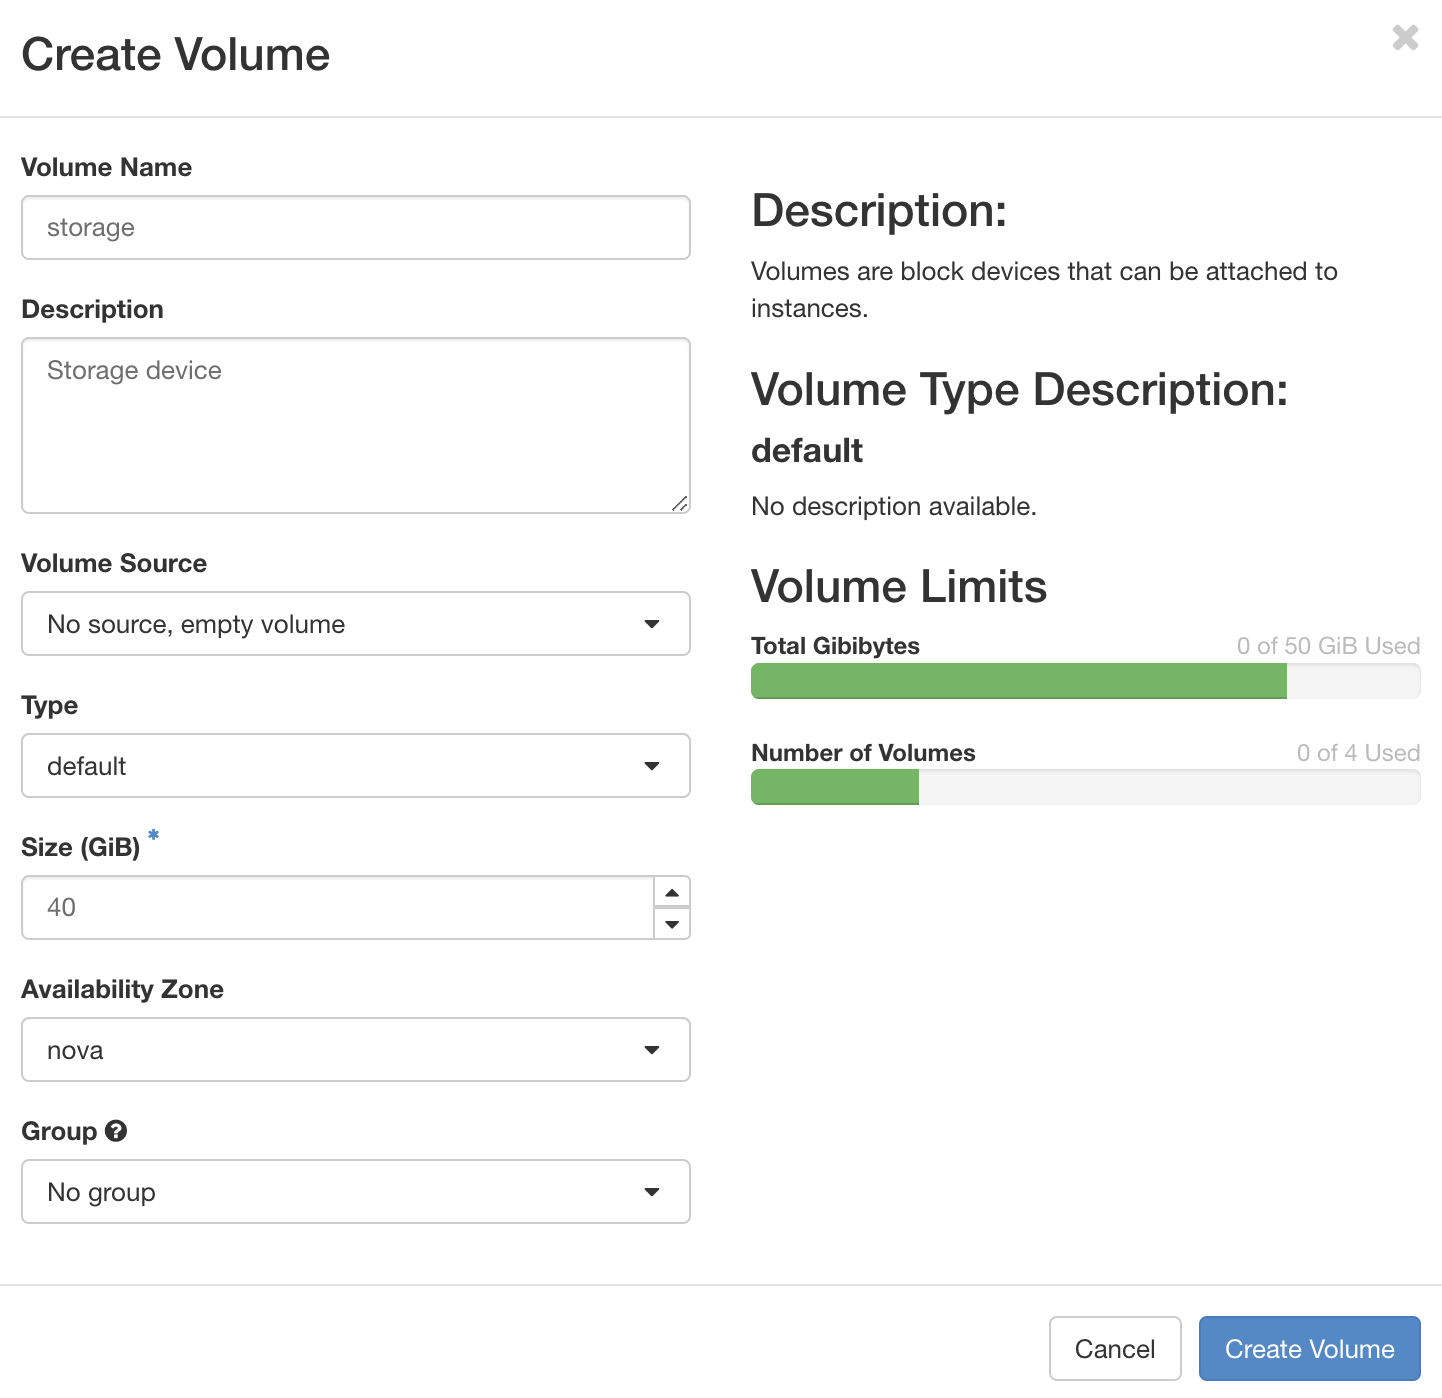
- A dialogue opens. Fill in the fields:
- Volume name: storage
- Size: 40 GiB
- Then click on Create Volume.
6.1.4 Attach the volume
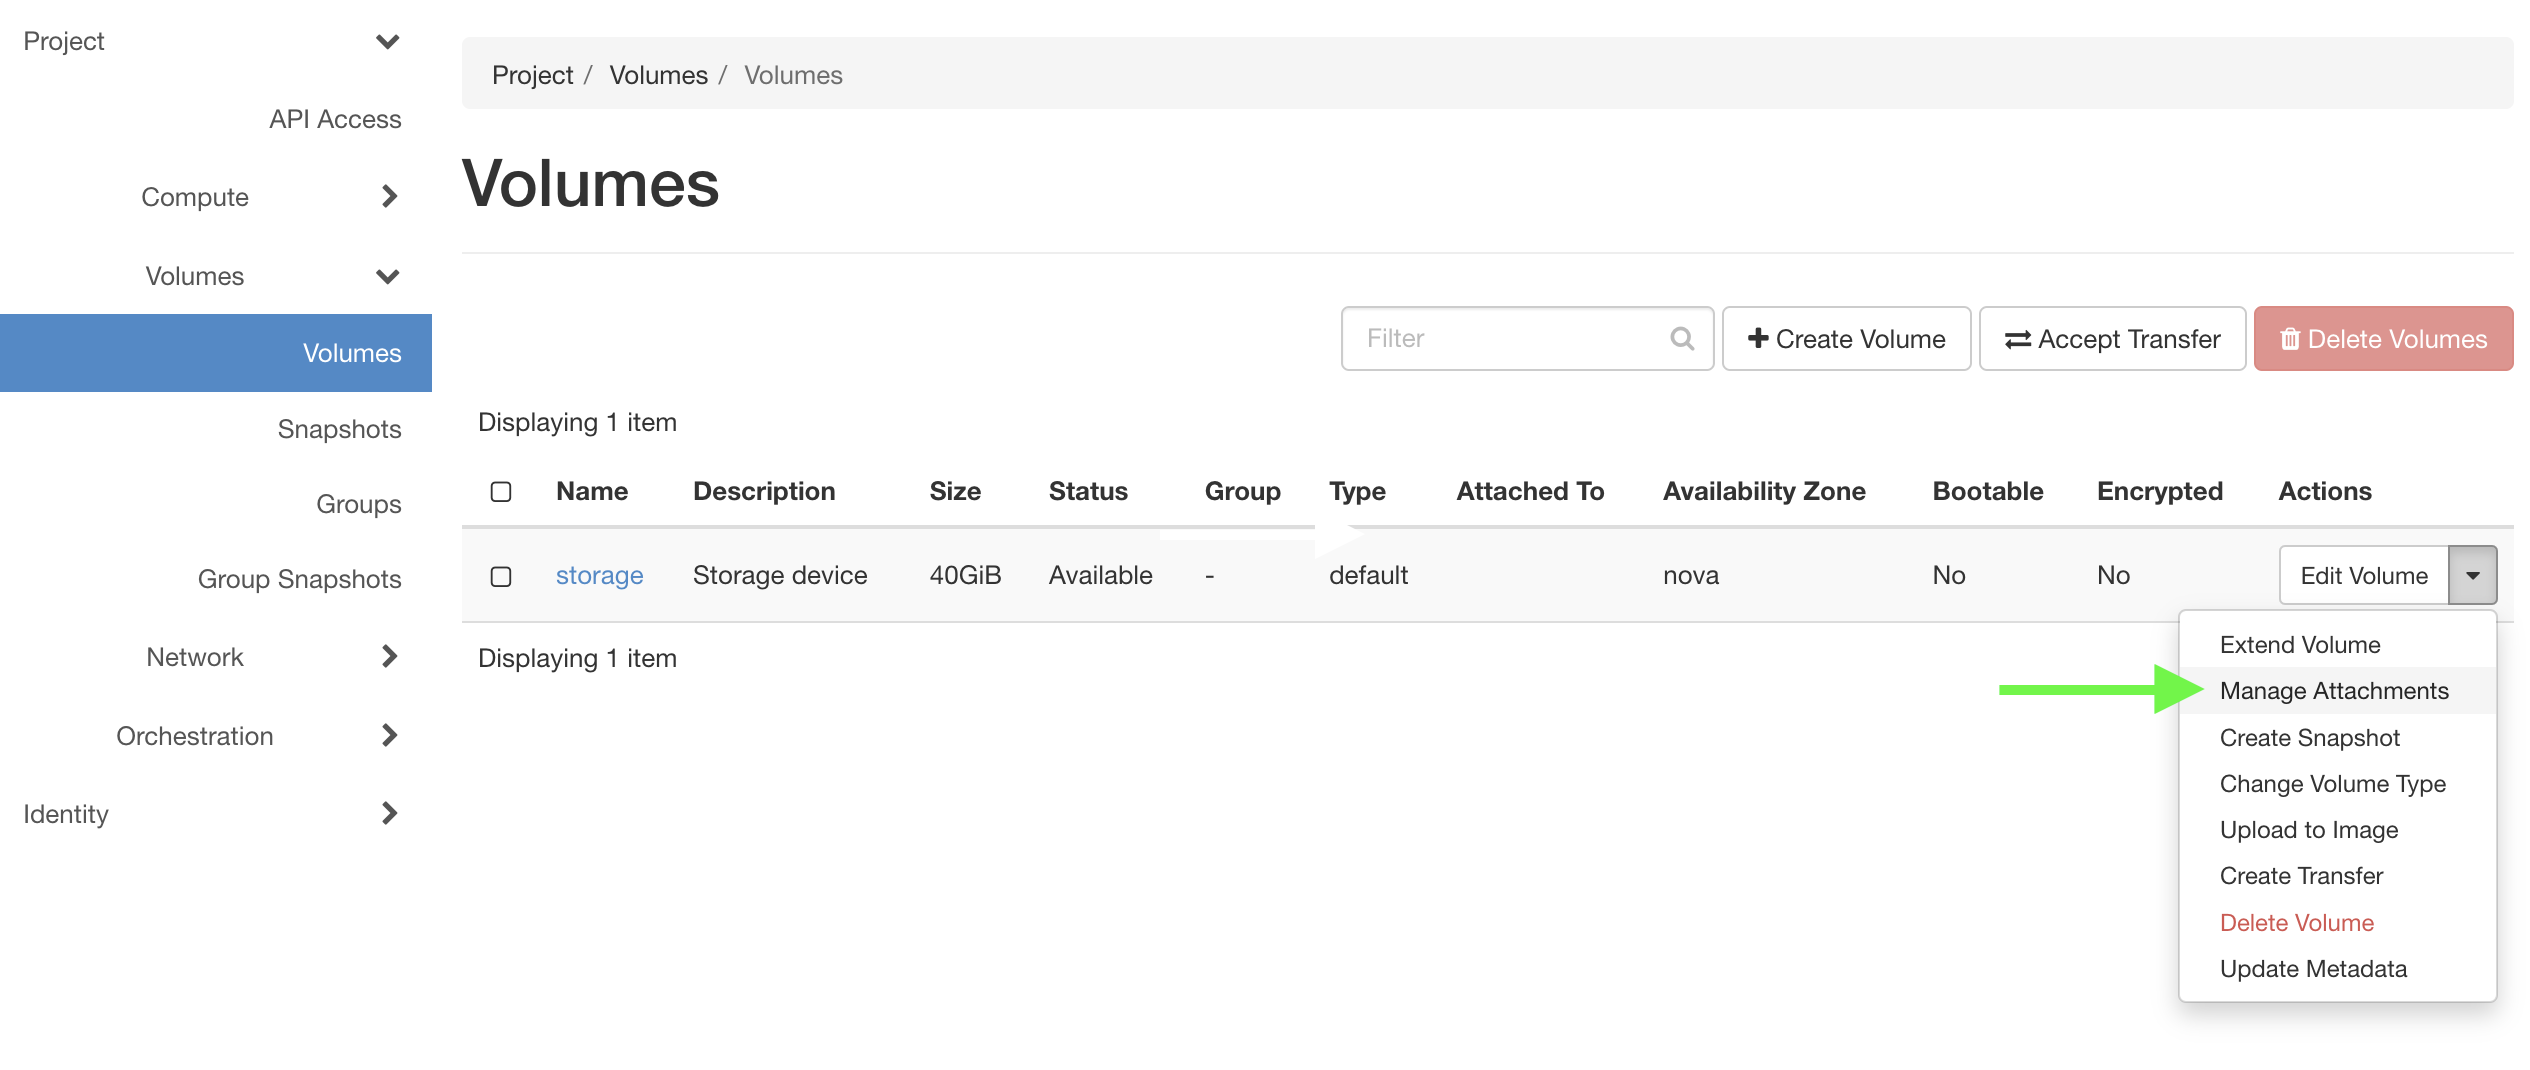
In order for a volume to be used by a virtual machine, it must be added (“attached”) to a VM.
- In the table row of our new volume “storage”, select the subitem “Manage Attachments” in the context menu at the right end of the row and click on the entry.
6.1.5 Attach volumes
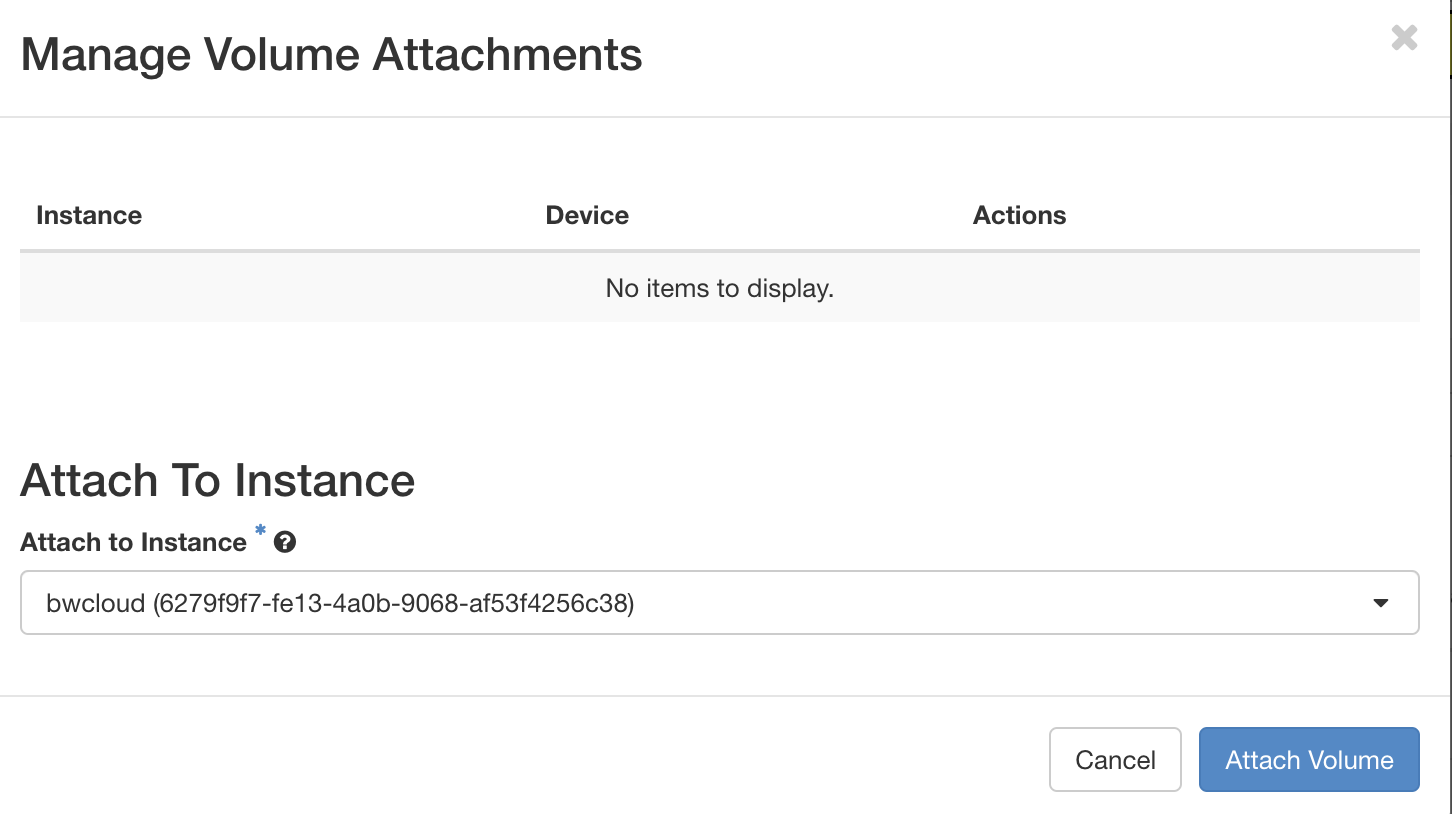
A dialogue opens: In the dialogue, select the desired virtual machine (“bwCloud”) and click on “Attach Volume”.
The table updates and the path under which the new volume can be reached from within the virtual machine appears in the “Attached To field”:
/dev/vdb on bwCloud6.2 Mount volume in VM
In Linux, the process of attaching a filesystem to a particular point in the directory tree is called mounting. This allows you to access the files and directories on the filesystem as if they were part of the filesystem on which you are currently working.
6.2.1 Log in your VM
- Connect to your virtual machine with VS Code remote connection (or your terminal)
6.2.2 Find volumne
- Enter the follwing command in the integrated terminal to find your volume (i.e. disk) using:
sudo fdisk -lThe output should include an entry like the following:
Disk /dev/vdb: 40 GiB, 42949672960 bytes, 83886080 sectors
Units: sectors of 1 * 512 = 512 bytes
Sector size (logical/physical): 512 bytes / 512 bytes
I/O size (minimum/optimal): 512 bytes / 512 bytes
6.2.3 Partitioning
Next, we need to partition our volume.
- This command will create a GPT (GUID Partition Table), which is a standard for the layout of the partition table on a physical storage device:
sudo parted /dev/vdb mklabel gptIf you see this: “Warning: The existing disk label on /dev/vdb will be destroyed and all data on this disk will be lost. Do you want to continue?”
Type:
YesWithin the partition environment, you can also set the size of the partition. In our case, we set the upper bound to 100%:
sudo parted /dev/vdb mkpart primary ext4 0% 100%6.2.4 Format partition
We want to format the partition with the ext4 filesystem. ext4 stands for “extended file system version 4”, which is a popular filesystem used in Linux systems to store and organize files on a storage device, such as a hard drive or solid-state drive.
- Format the partition:
sudo mkfs.ext4 /dev/vdbThis will output: Found a gpt partition table in /dev/vdb Proceed anyway? (y,N)
- Type:
Yes
6.2.5 Mounting
Before we mount the drive, we create a new directory in the /mnt/ directory where the drives are usually mounted in Ubuntu:
sudo mkdir /mnt/vdbOnce the directory is created, you can mount the drive as follows:
sudo mount /dev/vdb /mnt/vdbTo mount the drive permanently, we need to edit the file system table fstab. Therefore, we open the file with the text editor nano:
sudo nano /etc/fstabNow, add the following content at the end of the file:
/dev/vdb /mnt/vdb ext4 defaults 0 0It means that the partition located at /dev/vdb will be mounted to /mnt/vdb using the file system ext4, with default mount options and no dumping and no error-checking enabled.
Next, press
Ctrl+Oand confirm with enter to save the modifications you’ve made to the fileCtrl+Xto close nano.
To check if everything worked fine, we use sudo mount to list all mounted drives and combine it with grep vdb, which only returns our volume vdb:
sudo mount | grep vdbThis should output something like:
/dev/vdb on /mnt/vdb type ext4 (rw,relatime)You can change directory into your new volume and use it later to create new directories and store data in it:
cd /mnt/vdb6.3 Change permissions
Let’s change the file permissions for all the contents in the /mnt/vdb directory so we can read, write and execute files within this directory. In particular, this will allow us to modify files using VS Code without encountering a “permission denied” error.
- To change the permissions of all files and directories within /mnt/vdb we we use the chmod command with the recursive (-R) option:
sudo chmod -R 777 /mnt/vdbThis command will set the permissions to read (r), write (w), and execute (x) for the owner, group, and others on all files and directories within /mnt/vdb.
However, please exercise caution when setting permissions to 777, as it grants full access to everyone, which may have security implications. Therefore, make sure to adjust the permissions as necessary based on your specific requirements and security considerations in your use cases.